Manage subscription & billing
Updated Dec. 10, 2025 by SupportFrom the Billing page, administrators can manage coach seats, review upcoming payments, and track payment history.
This section provides a clear overview of your active plan, renewal dates, and billing adjustments related to seat management.
 Manage Coach Seats
Coach seats represent the number of active coaches allowed under your enterprise account.
You can add or remove seats at any time, depending on your organization’s needs.
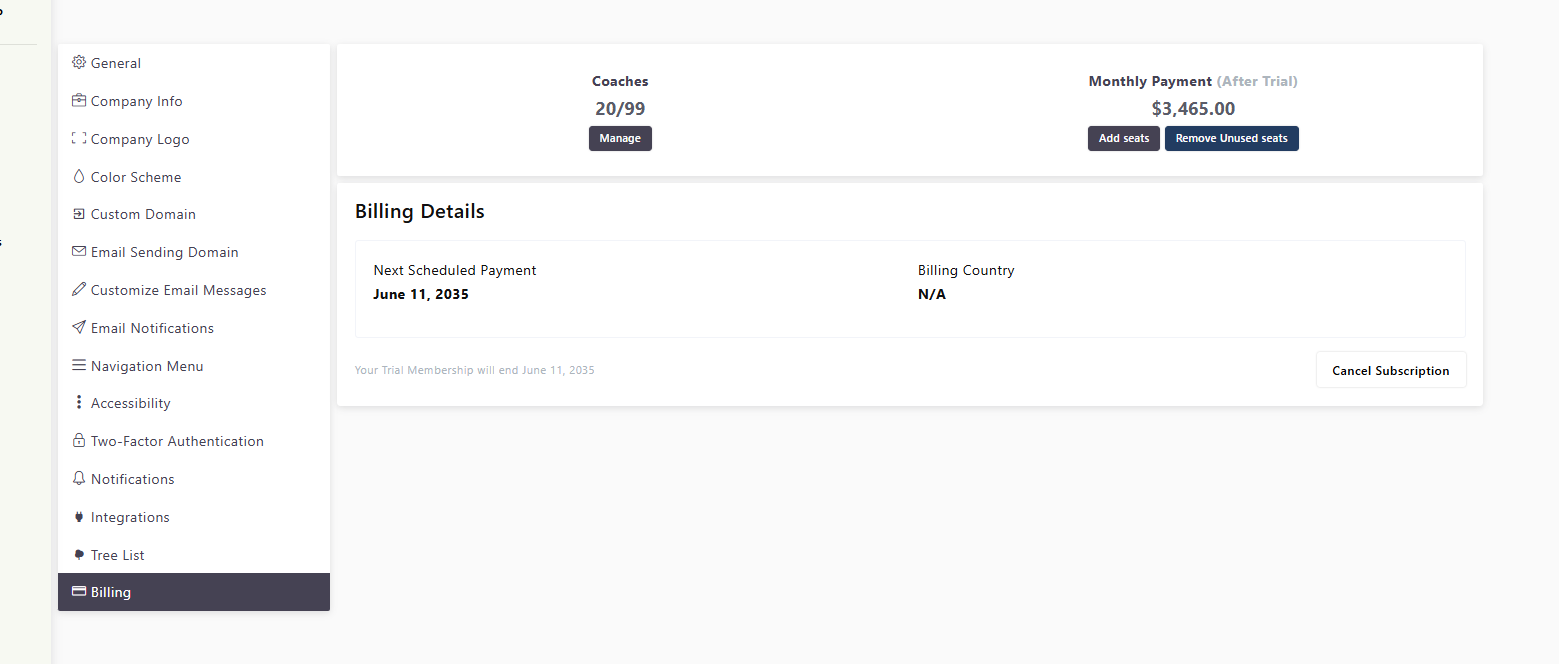
 Add Coach Seats
-
During the trial period:
If you add a coach seat while your account is still in the trial period, your account will not be charged immediately.
The total billing amount — based on your updated coach seat count — will be calculated and billed after your trial ends. -
After the trial period:
If you add a coach seat after your trial has expired, your account will be charged immediately for the prorated amount based on the remaining days in your current billing cycle.
The new total, reflecting the updated number of seats, will take effect on your next scheduled billing date. -
To Add a Coach Seat:
- Go to Settings → Billing.
- Click Add Seats.
- Enter the number of coach seats you want to add, then click Next.
- Review the updated total seat count and the new billing amount.
- Click Proceed to confirm and apply the changes.
Remove a Coach Seat
- Go to Settings → Billing.
- Click Remove Unused Seats.
- The system will display the number of unused seats available.
- Enter the number of seats you want to remove and click Next.
- Review your updated seat count and the new billing amount.
- Click Proceed to confirm the changes.
Note: If you don’t have any unused seats, you must free them before removal.
To free a seat:
- Go to Manage under Coaches.
- You’ll see the list of active coaches in your organization.
- Click Options next to the coach you want to remove.
- Select Remove to release the seat.
- Once the seats are free, return to Billing, click Remove Unused Seats, and follow the steps above.
Once confirmed, your account will automatically update and reflect the adjusted number of coach seats in your next invoice.
What Happens Next
- Your billing dashboard will update automatically after any seat or plan change.
- You can always return to the Billing page to re-subscribe, upgrade, or adjust your plan settings as needed.
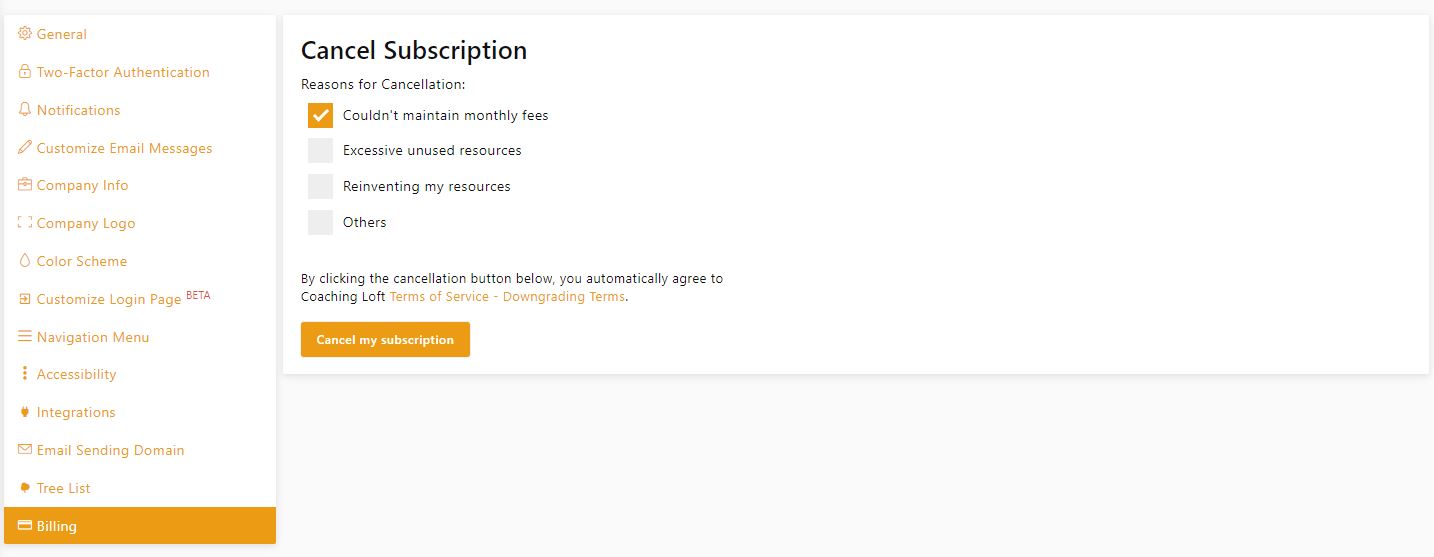
Cancel Your Subscription
If you wish to cancel your subscription, follow these steps:
- Log in to your Enterprise Account.
- Go to Settings → Billing.
- Click Cancel Subscription.
- Complete the Downgrade Form when prompted.
- You’ll then be redirected to the Stripe Customer Portal.
- Click Cancel Plan to finalize your cancellation.
 Pro Tip:
Export all necessary data before canceling your subscription, as the system will no longer retain your account information after cancellation.