Add authorized users
Updated Oct. 30, 2025 by SupportThe Authorized Users feature allows the primary administrator to grant other team members access to the enterprise admin portal.
Each authorized user can manage platform settings, view reports, or perform specific administrative actions based on their assigned role.
 Understanding Permission Types
Each authorized user is assigned a permission level that determines what they can view or modify on the platform.
| Permission Type | Description |
|---|---|
| Read |
Grants view-only access. Typically assigned to external stakeholders such as HR managers, CEOs, or partners from other organizations being coached. These users can view coachee records within their company but cannot edit or modify data. |
| Edit |
Allows users to access and edit all data and records in the enterprise account but does not grant access to administrative settings such as adding authorized users or managing billing information. |
| Full |
Provides complete administrative access — identical to the account owner. Users with Full access can edit all records, manage account settings, billing, and other administrative tools. |
 Pro Tip:
Assign permission types carefully to protect sensitive information and maintain proper access control.
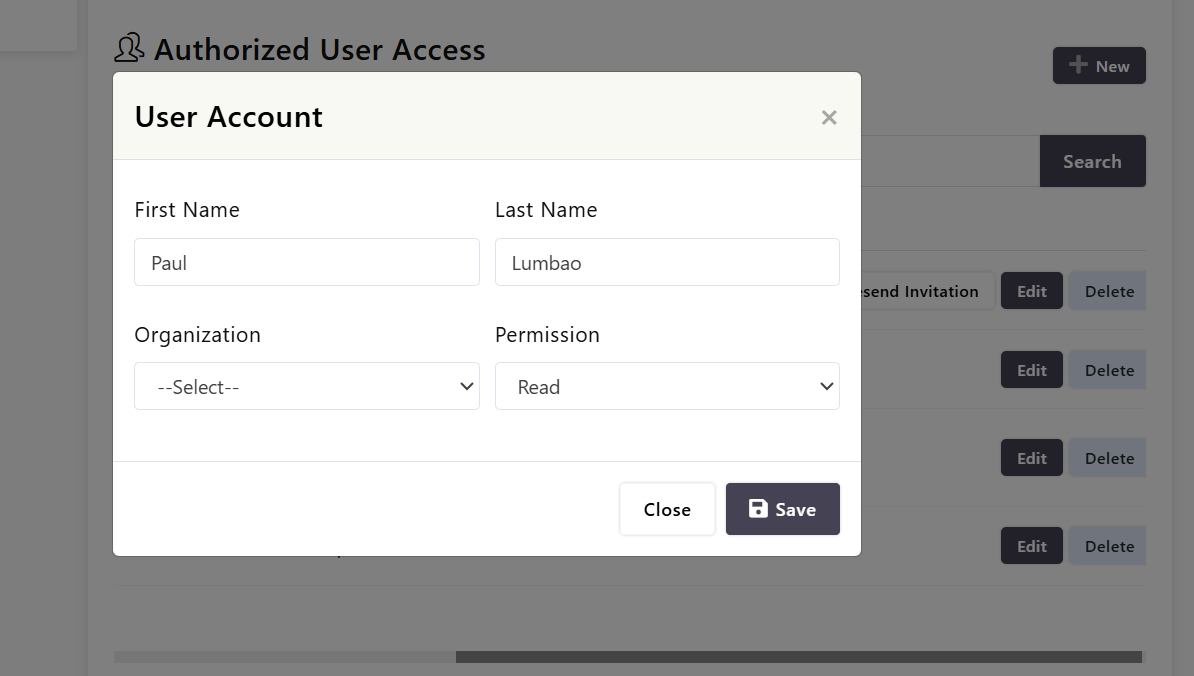
Add an Authorized User
- Go to Settings from your admin portal.
- In the left-hand menu, select General.
- Scroll down to the Authorized User Access section.
- Click the New button next to the Authorized User Access header.
- Fill in the form fields:
- Full Name
- Email Address
- Organization – select the organization this user belongs to:
- If you select a client organization or a department within your company, the user will automatically be assigned Read-Only access.
- If you select your main account organization name, you can manually choose the permission level (Read, Edit, or Full).
- Note: If no organization is selected, the system will automatically assign the main account organization name by default.
- Permission Type (Read, Edit, or Full – based on your organization selection).
- Click Save to add the user.
- The platform will automatically send an invitation email to the user with instructions to activate their account.
Manage Authorized Users
- To resend an invitation, click the Resend Invitation button next to the user’s name.
- To edit a user’s details, or permission use the edit options next to their name.
- To remove a user’s, use the delete button.
 What Happens Next
Once the user accepts the invitation, they can log in using their email and password. Their access level and permissions take effect immediately based on the role assigned.