Manage your coachees
Updated Dec. 10, 2025 by SupportThe Coachees section is where you manage your clients’ accounts and track their coaching journey. From here, you can view profiles, monitor activities, assign tasks, add goals, upload files, and more.
 Access your coachees' List:
To access your coachee list:
- Click on the Coachees tab in the left-hand menu of your coach portal.
- You will be directed to your Coachee List.
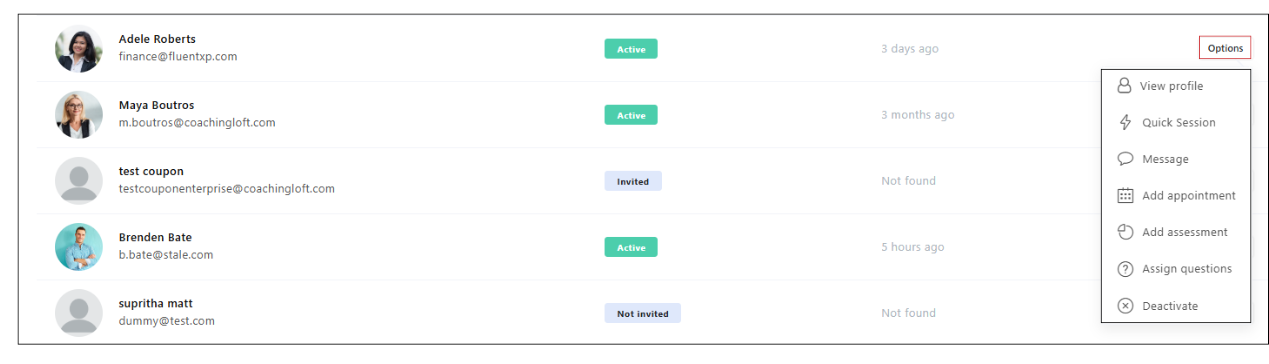
Here, you can view all your coachees and use filters to narrow your search based on specific criteria.
 Pro Tip
Each coachee entry includes a Quick Access menu. Click Options on the right side of the entry to perform common actions quickly—saving you time and improving efficiency.
Add a New Coachee
- Go to the Coachees tab in the left-hand menu.
- Click New at the top of the panel.
- In the modal, fill in the coachee’s:
- First Name
- Last Name
- Email Address
- (Optional) Click Send Invitation to invite them immediately.
- Click Submit to save the coachee to your list.
 Important Notes:
- If you click Send Invitation, the coachee will receive an activation email to create their account.
- If you don’t send the invitation, the coachee will remain on your list but won’t have portal access until invited.
- You can only edit a coachee’s name and email while their account is still inactive.
 Coachee Status Indicators:
- Active → Invitation accepted and account activated.
- Invited → Invitation sent but not yet activated. To resend: click Options > Resend Invitation.
- Not Invited → Coachee added but no invitation sent. Invite later via Options > Send Invitation.
Create and Manage Coachee Groups
Coaches can organize their coachees into groups based on criteria they choose. This helps manage programs, track progress, or deliver group coaching more efficiently.
Create a Coachee Group:
- Click Coachees in the left-hand menu.
- Click Coachee Group.
- Click Create.
- Filter coachees based on your chosen criteria.
- Select the coachees you want to add to the group.
- Click Next.
- Enter a Group Name and an optional Description.
- Click Next to save.
The new group will now appear under the Coachee Groups section in your list.
Edit a Coachee Group:
- Go to the Coachee Groups section.
- Click on the group name you want to edit.
- Update the group name, description, and add or remove coachees as needed.
- Click Save Changes to apply your updates.
Delete a Coachee Group:
- Go to the Coachee Groups section.
- Click on the group name you want to remove.
- Remove all coachees from the group.
- Click the trash bin icon to delete the group.
The group will be permanently removed from your list.
 Important Note:
Deleting a coachee group does not delete the individual coachees from your account. It only removes the group structure. All coachees will remain available in your coachee list.
Manage your Coachees
Each coachee in your account has a dedicated profile where you can manage their entire coaching journey. From this view, you can track activities, set goals, assign actions, upload files, write notes, review session logs, and manage assessments—all in one place.
Access a Coachee Profile
- Click Coachees in the left-hand menu.
- Click on the coachee’s name in the coachee list.
- You will be redirected to the coachee’s profile page.
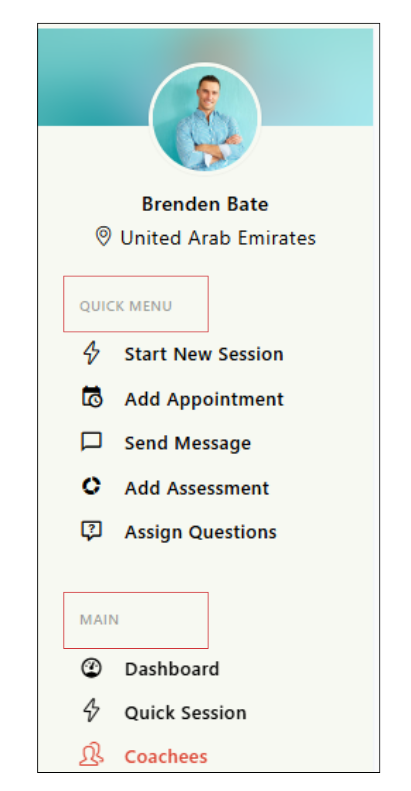
Quick Menu
A Quick Menu appears in the left-hand menu of your portal whenever you are inside a coachee profile. This allows you to interact with your coachee instantly:
- Start New Session
- Add Appointment
- Send Message
- Add Assessment
- Assign Questions
View Activity Summary
The Activity Summary tab gives you a snapshot of your coachee’s overall engagement on the platform. From here, you can see their recent activity logs, upcoming appointments, and completed sessions.

Actions
Assign and track tasks for your coachee:
- Actions include a progress slider and progress meter to track completion.
- A built-in comments system allows quick feedback between coach and coachee.
Add a New Action:
- Go to the Actions tab.
- Click New at the top-right corner.
- Enter the Action/Task name and due date.
- (Optional) Link it to an existing goal.
- (Optional) Make the action recurring by setting frequency and duration.
- Click Save.
Note:
- The action will appear in your coachee’s account under their Actions tab.
- You will receive an email notification whenever your coachee updates the progress meter or changes the task description.
- Coachees can also create their own actions from their portal. If they assign the action to be monitored by you, you’ll receive notifications about their updates.
Goals & Milestones
Structure long-term development:
- A Goal is a broad objective with one or more Milestones.
- A Milestone contains multiple Actions.
- A Milestone is completed when all related Actions are complete.
- A Goal is complete only when all related Milestones are complete.
Create a New Goal:
- In your coachee profile, Go to the Goals tab.
- Click +New Goal.
- Enter a title and due date.
- Click Submit.
Add a Milestone:
- Under a goal, click View Milestones.
- Click +New Milestone.
- Enter a title and due date.
- Click Save.
Create an Action under a Milestone:
- In the milestone view, click View Milestone
- Click Options > Add New Action.
- Enter the Action/Task name and due date.
- Click Save.
Note:
- Coachees can also create their own goals. These will appear in the Goals tab of their profile.
- You will receive an in-app notification and email alert when a coachee creates or updates a goal.
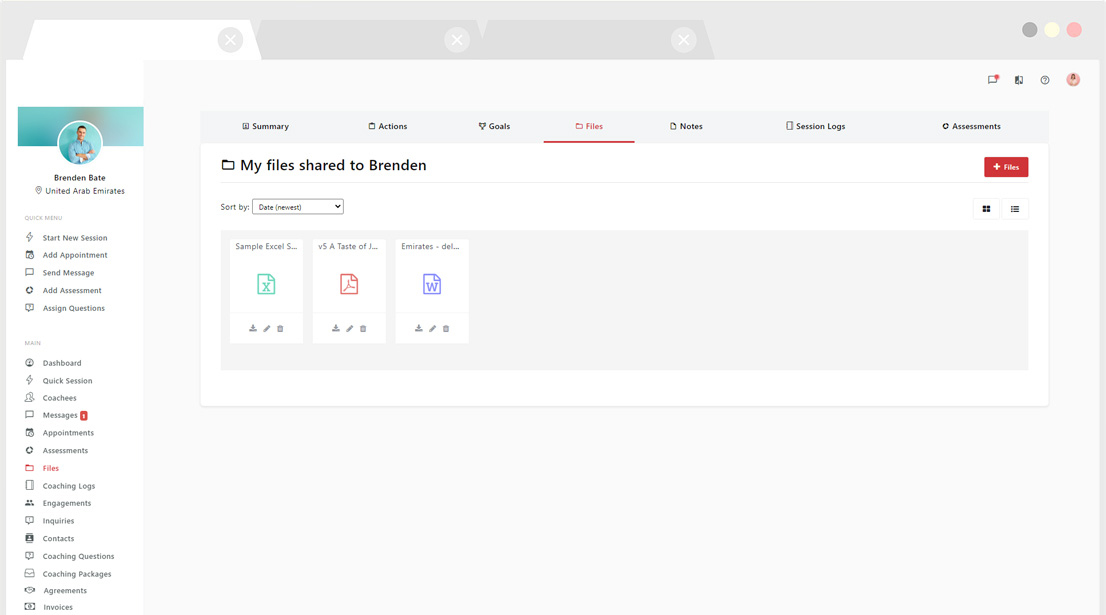
Files
Upload and share resources directly with your coachees.
Upload a File:
- Go to the Files tab in the coachee profile.
- Click + Files.
- Attach a file from your device.
- Select the permission level:
- Private → visible only to you.
- Shared → visible to the coachee.
- Click Submit.
Note:
If marked “Shared,” the coachee will receive a notification and email alert.
Notes
In this section, you can view your own notes and any notes shared with you by your coachee. Notes created by you are private and are not visible to coachees in their portal.
Create a New Note
- Go to the Notes tab in your coachee’s profile.
- Click + New.
- Enter the Title and Description.
- Click Save Changes to create your note.
Your note will be saved automatically, and you can add comments to it at any time.
Filter Notes
In the Notes page, you can filter to:
- View only the notes you created, or
- View notes shared by your coachee.
Pro Tip:
-
During a coaching session, pull up your notes anytime by clicking the Notes tab in the Session Notepad.
-
Use private notes to capture session reflections, insights, or next steps.
-
Review shared notes from your coachees to stay aligned on progress.
Session Logs
In this view, you can access the history of attended coaching sessions with your coachee. Each entry provides key session details, helping you keep track of progress and engagement.
You can view:
-
Session Title
-
Date
-
Duration
-
Status: Attended sessions only
Assessments
In this section, you can see all completed assessments submitted by your coachee. These help you evaluate progress and identify focus areas for future sessions.
You can:
-
Review completed assessments and answers
-
Reference assessment results during coaching sessions
Pro Tip:
To view pending or upcoming assessments, go to the Assessments tab in the left-hand menu of your coach portal.