Dashboard Guide
Updated Jul. 18, 2025 by Support For Coaches
For Coachees
For Enterprise Accounts and Coaching firms
After logging in to Coaching Loft, you will automatically land on your Dashboard. This serves as the central hub of your account—designed to give you a snapshot of your activity, quick access to essential features, and a streamlined overview of your coaching operations.
For Coaches
The Coach Dashboard is tailored to provide an efficient and intuitive user experience. It offers direct visibility into your most relevant and time-sensitive data, allowing you to take action quickly.
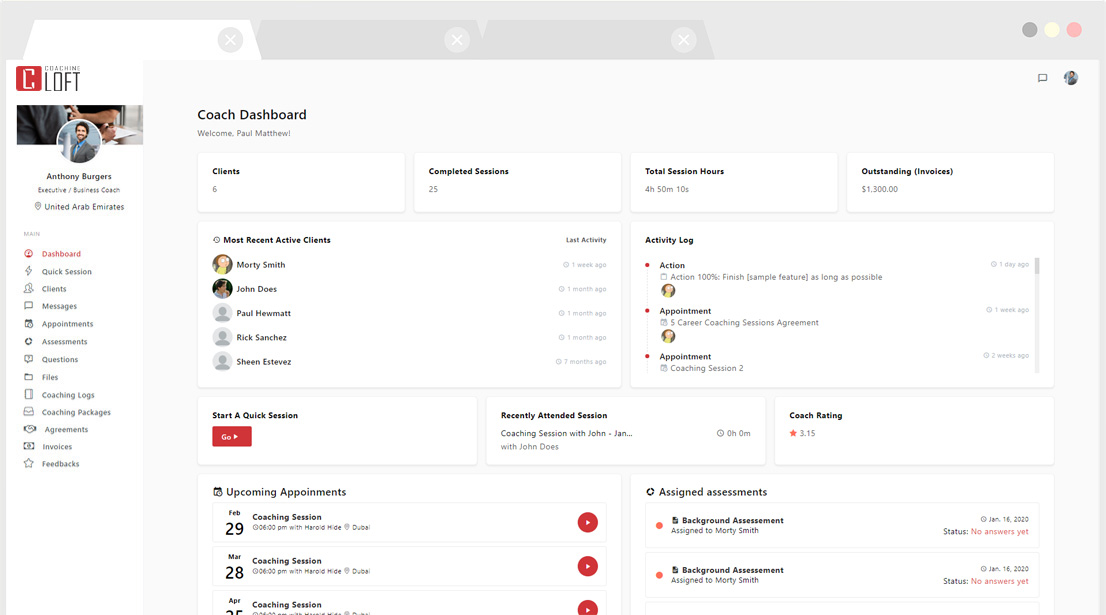
Key features visible on the Coach Dashboard include:
- Upcoming Sessions
- Pending Actions
- Coachee Overview
- Activity Logs
- Unpaid Invoices
- Quick Navigation Widgets: One-click access to key features like:
- Add New Coachee
- Start a Live Coaching Session
- View Session Logs or Reports
- Performance Metrics:
- Number of active coachees
- Sessions completed this month
- Coaching hours delivered
- Coach Rating
For Coachees
The dashboard is designed to help coachees stay informed and organized, making it easier to collaborate and follow through on coaching engagements.
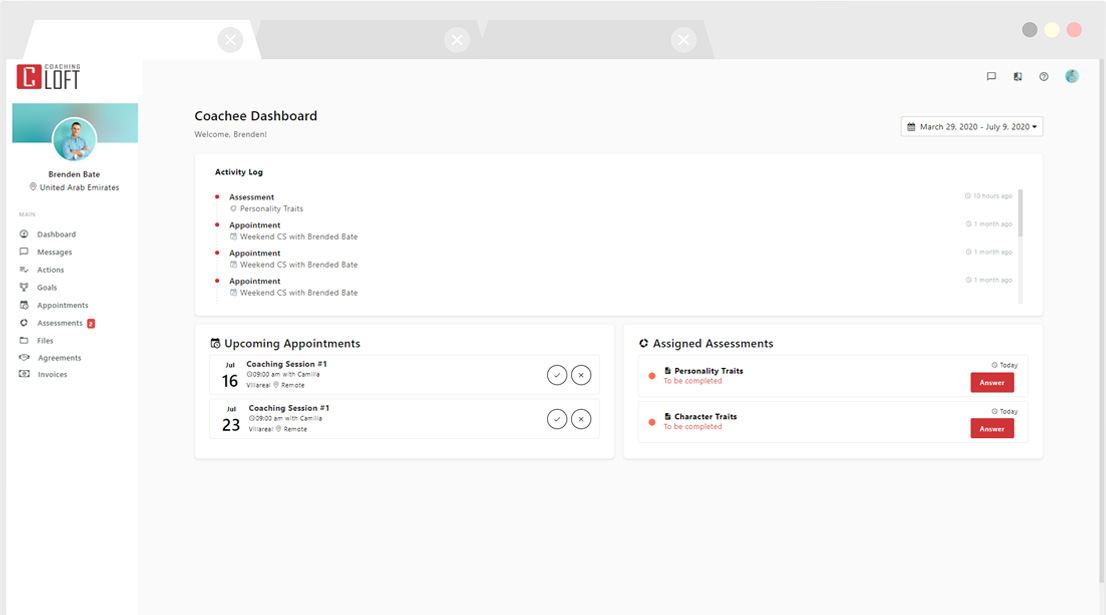
Key features visible on the Coachee Dashboard include:
-
Activity Logs
Access the most recent session updates, notes, and shared content from your coach. - Upcoming Appointments
View all scheduled coaching sessions with exact dates, times, and statuses (e.g., confirmed, cancelled, or rescheduled). -
Assigned Assessments
See all assessments assigned by your coach—whether pending, in progress, or completed. - Coach Selection (for Enterprise and Coaching Firm Accounts)
- Coach Finder: You can independently select a coach from your organization's pool of available coaches.
- Coach Matching: Admins shortlist multiple coach options for you, based on predefined criteria
For Enterprise
The Enterprise Dashboard in Coaching Loft is built to provide high-level visibility and operational control over your organization’s coaching activities. It enables enterprise admins to monitor coaches, coachees, sessions, and engagement progress in real time—empowering better decision-making and resource allocation.
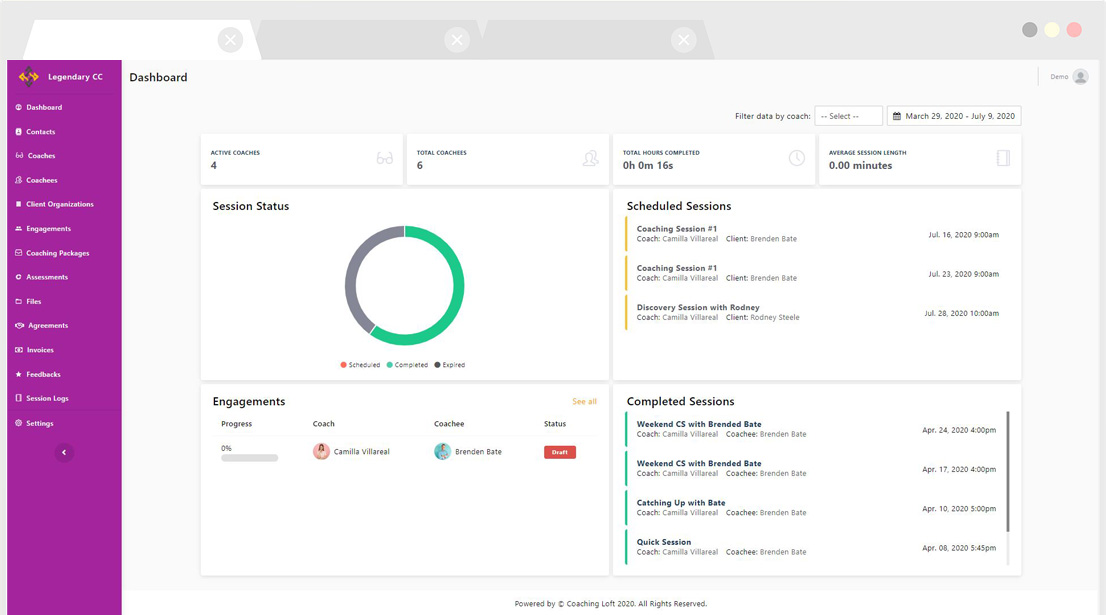
Key Features of the Enterprise Dashboard
![]() Account Statistics
Account Statistics
Gain a quick overview of your organization’s coaching footprint:
- Total Number of Coaches
- Total Number of Coachees
- Total Coaching Hours Completed
- Average Session Duration
![]() Session Logs
Session Logs
Stay informed on coaching activity and delivery across your enterprise:
- Scheduled Sessions
- Completed Sessions
- Session Status Metrics
![]() Engagements Monitoring
Engagements Monitoring
Stay aligned with progress and program success:
- Most Recently Updated Engagements
- Engagement Status Overview
![]() Data Filters for Insights & Control
Data Filters for Insights & Control
Refine your data view for deeper insights:
- Filter by Coach
- Filter by Coachee
- Filter by Date Range