Managing your Appointments
Updated Jul. 04, 2025 by Support For Coaches
For Coachees
For Enterprise Accounts and Coaching firms
The Appointments Calendar provides a centralized view of all your coaching sessions—past, current, and upcoming. It is your go-to tool for scheduling, updating, and managing appointments on the platform.
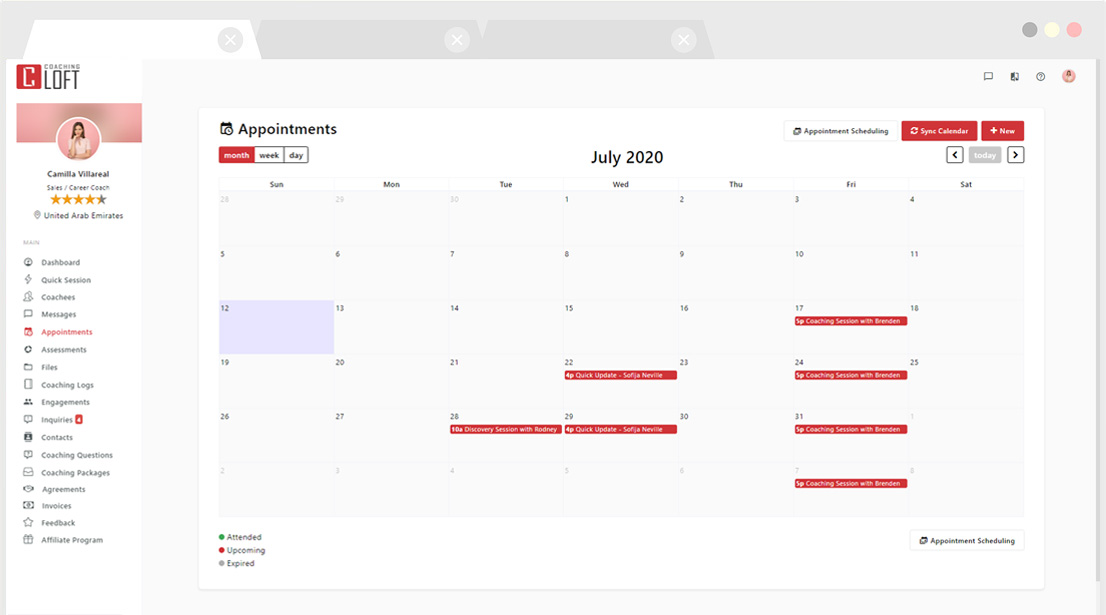
 Scheduling Appointments
 For Coaches
To schedule a new coaching session:
- Go to the Appointments section in the left-hand menu of your coach portal.
- Click the "+New" button at the top right of the calendar or click directly on a specific date.
-
Select your coachee(s):
- If you select one coachee, you’ll see time slots based on their availability.
- If you select multiple coachees, all time slots will appear by default for group sessions.
-
Complete the required fields:
- Session title
- Date & Time
- Session Title
- Date & Time
- Location
- If it’s an online session with one coachee: You can choose between:
- Coaching Loft (CL) meeting link
- Zoom or Microsoft Teams (if integrated) – the platform will automatically insert the default video meeting link in the appointment invitation.
- If it’s an online session with multiple coachees: You must select either Zoom or Microsoft Teams (if integrated), and the platform will insert the appropriate meeting link automatically
- If it’s an online session with one coachee: You can choose between:
- (Optional) Select a time zone. By default, the platform uses your availability settings.
- (Optional) Add a message
- (Optional) Enable the "Create series of appointments" option if the session repeats.
- Click “Save Changes.”
![]() Note:
Note:
- An email notification and a platform notification will be sent to your coachee with daily reminders to confirm their response.
- An automated email and a platform notification reminder will also be sent 1 hour before the session starts.
For Coachees
Coachees can also request appointments from their dashboard:
- Go to the Appointments section in the left-hand menu of your coach portal
- Click the "+New" button or double click on a date from the calendar.
- Select your coach.
- Fill in the appointment details.
- Click “Save Changes.”
![]() Note:
Note:
- Your coach will receive a daily platform notification and an email to confirm or decline your request.
- An automated email and a platform notification reminder will also be sent 1 hour before the session starts.
![]() Important Note:
Important Note:
Coachees within an enterprise or Coaching Firm account can choose to invite an authorized user to the meeting (such as HR, head of Learning, Head of department), by clicking the "invite authorized user" option
For Enterprise Admin:
Admins can schedule appointments between coaches and coachees:
- Go to the Coaches list.
- Click "options" next to the coach’s name
- Click “Schedule an Appointment.”
- You will be redirected to the coach’s calendar.
- Add the appointment title and select the coachee(s).
- Choose the meeting location (in person or online)
- Choose the date and time slot (based on the coach’s availability).
- (Optional) Add a message.
- Click “Save Appointment.”
Email and platform notification will be sent to all participants.
Updating Scheduled Appointments
To update appointment details, simply click the appointment from the calendar to open the appointment modal. Update the fields you wish to change then click "Save Changes". An email notification will be sent to the invitees upon submitting the changes made to the scheduled appointment.
![]() Important Note:
Important Note:
- Coaches can update appointments they have scheduled, as well as those scheduled by their coachees.
- Coachees are only allowed to modify appointments they have personally scheduled.
- Admins do not have the ability to modify or cancel appointments scheduled between coaches and coachees.
Cancellation/Deleting Appointment
To cancel or delete:
- Open the appointment from the calendar.
- Click the Trash Bin icon at the bottom to delete the session.
![]() Important Note:
Important Note:
- Coaches can cancel appointments they have scheduled, as well as those scheduled by their coachees.
- Coachees are only allowed to cancel appointments they have personally scheduled.
- Admins do not have the ability to modify or cancel appointments scheduled between coaches and coachees.
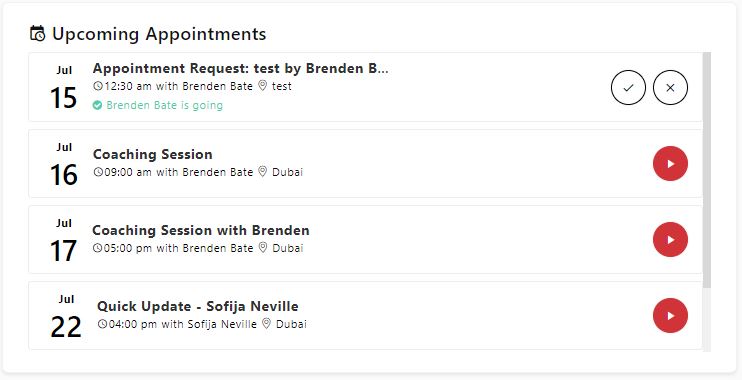
Responding to Appointments (from the Dashboard)
- From the Coach Dashboard, you can:
- Start sessions using the red "Start" button beside each appointment.
- Respond to coachee-created sessions with "Going" or "Not Going."
- From the Coachee Dashboard, you can:
- Confirm appointments scheduled by coaches with "Going" or "Not Going"