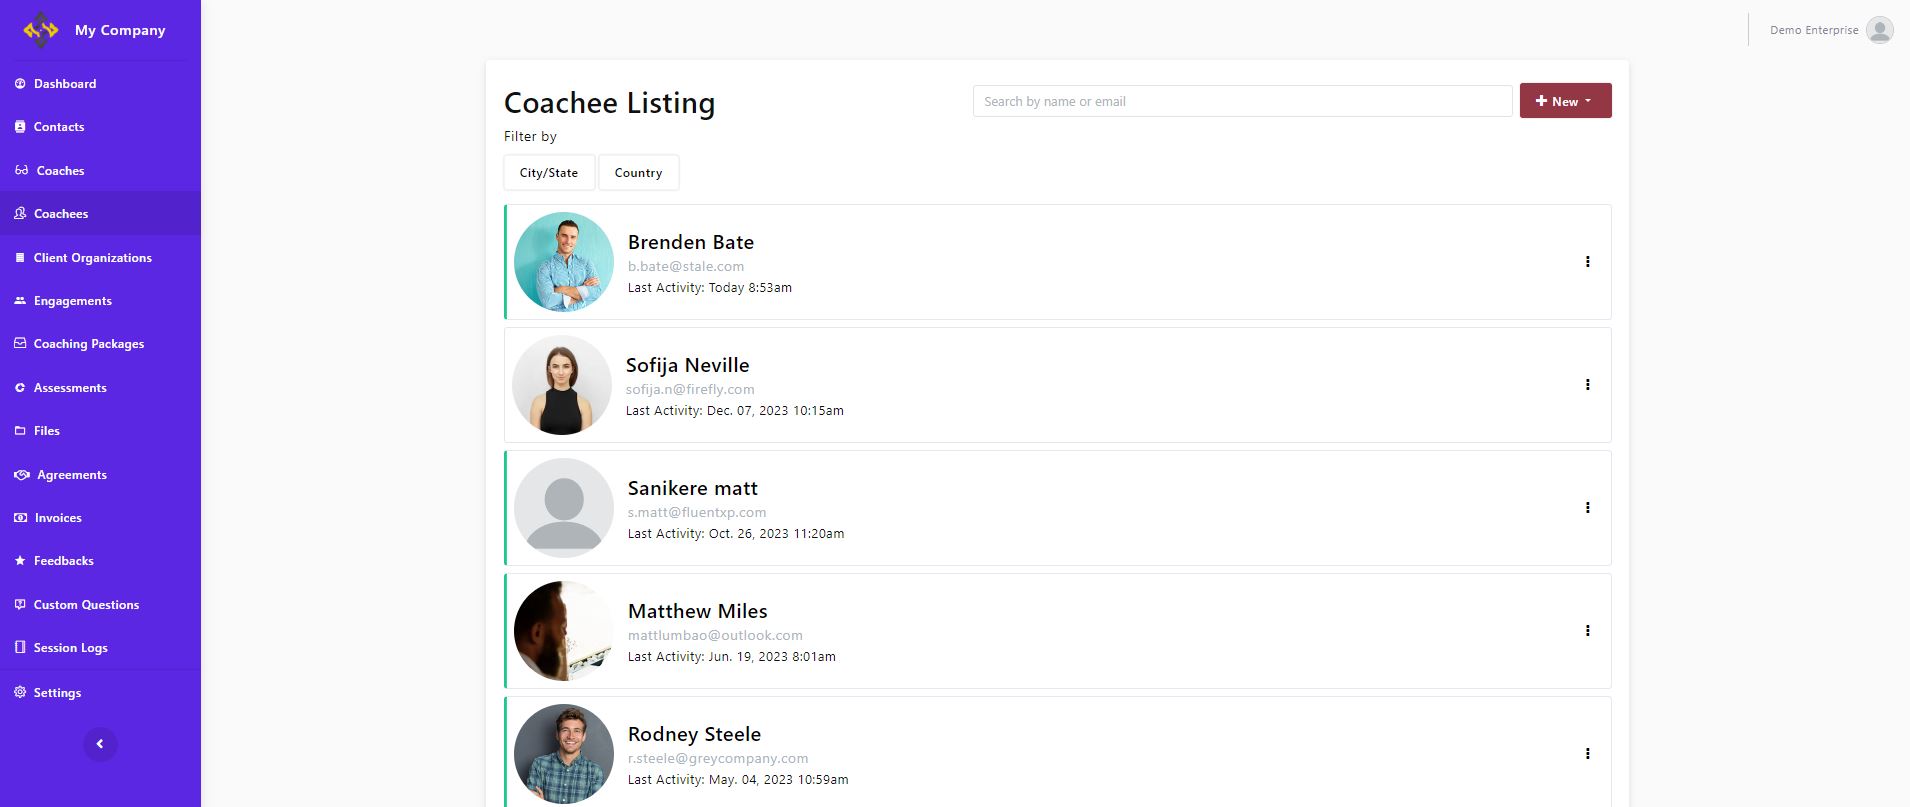
Manage Coachees
Updated Dec. 11, 2025 by SupportThe Manage Coachees page gives enterprise admins full control over coachees within their account. From here, you can add new coachees individually or in bulk, manage their status and details, remove coachees when needed, and assign them to coaches. Unlike coaches, coachees do not require seat allocation, so you can add as many as your organization requires.
 Add New Coachees
In this section, you can add coachees to your enterprise account either one by one or in bulk. Individual entry is quick and simple, while bulk upload lets you import large lists of coachees using a CSV file. Both options make it easy to grow and manage your coachee base.
 Add a coachee
- Go to the Cochee tab, on the lef-hand menu in your Portal.
- Click the +New button at the top of the panel.
- Click +Add new coachee.
- A modal will appear—Fill in the coachee’s:
- First Name
- Last Name
- Email Address
- Send Invitation
- If you check "Send Invitation", an invitation email will be sent to the coachee so they can activate their Coaching Loft account.
- If you leave this unchecked, the coachee’s details will be saved in your list, but they will not have access to their portal until you send the invitation and they activate their account.
- Click "Submit" to save the coachee to your list.
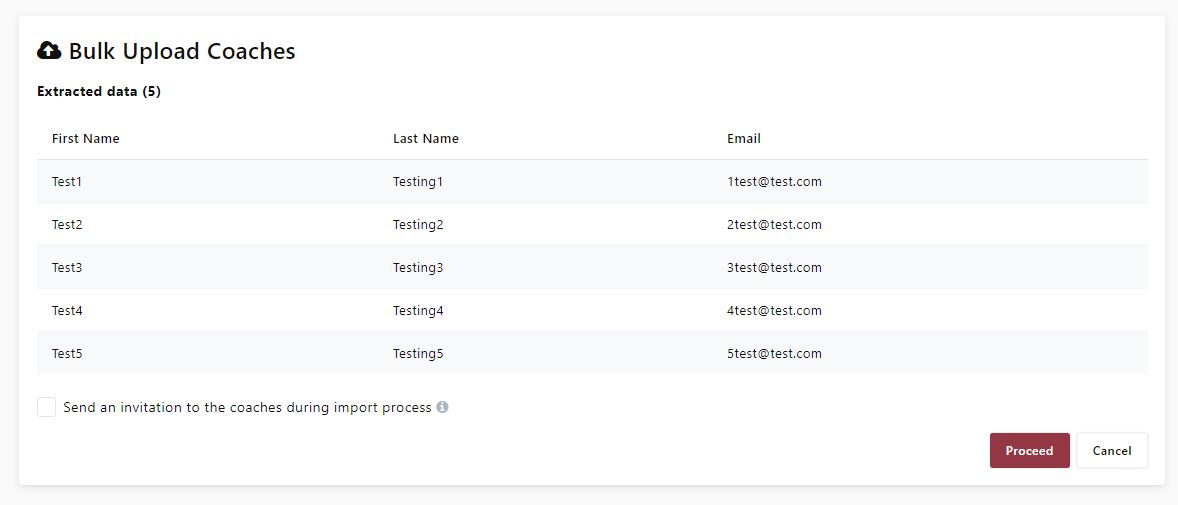
Bulk upload coachees
- Go to the Cochee tab, on the lef-hand menu in your Portal.
- Click the +New button at the top of the panel.
- Click bulk upload coachees.
- Browse and upload the prepared CSV file.
- Review the extracted data and click proceed to complete the upload.
 Useful Tips:
- Always check the file format guide before uploading your CSV.
- Optional settings during bulk upload:
- Associate with Organization – include the organization name in your CSV to link each coachee with their organization in Coaching Loft.
- Send an invitation during import – enable this to automatically send activation emails to all imported coachees.
Manage Coachees
Here you can monitor and update coachee information. Track their status, edit personal details, and remove coachees when needed. This section gives you full control over managing your coachee list.
View coachee status
- Active: The coachee has received the invitation email and activated their account. A green line will appear next to their name in the list.
- Inactive: The coachee was added but not invited. To invite them, click Options > Send Invitation.
- Invited: The invitation email has been sent, but the coachee has not yet activated their account. To resend the invitation, click Options > Resend Invitation.
Edit coachee Details
- Click the Options button next to the coachee’s name.
- Select Profile.
- Under About, you can edit the coachee’s personal information, meeting modality, and other settings.
 Important Note:
ou can only edit a coachee’s email address while their account is still inactive. To change the email of an active coachee, please contact [email protected]
Remove coachees
- Click the Options button next to their name.
- Select Remove.
Assign coaches to coachees
Once coachees have been added, you can assign them to coaches within your enterprise account. This ensures each coachee is connected with the right coach to begin their coaching journey.
- Go to the Coachee tab in the menu.
-
Click Options next to the coachee’s name.
-
Select Coaches. Here you can see all assigned coaches and add new ones if needed.
-
Click +Assign.
-
Use filters to find coaches that match your criteria.
-
Select one or multiple coaches to assign to the coachee.
Both the coach and the coachee will receive a platform notification and an email confirming the assignment.